Whether this is your first renovation, or your next home upgrade, this in-depth guide on how to tile a bathroom breaks the process down into approachable steps – from preparation and design right through to those magical finishing touches – with tips that are both practical and inspiring.
Throughout this article, we’ll provide information on:
Advice on Preparation, Tiling and Grouting
Tools and Products you’ll need
Creating a Shower Hob
Waterproofing* your Bathroom
Laying Bathroom Tiles
Tools & Materials Checklist:
Quality bathroom tiles – wall and floor tiles
Tile spacers, notched trowel, float
Tile cutter or wet saw
Waterproof membrane and primer
Adhesive and grout
Spirit level and tape measure
Rubber mallet and grout sponge
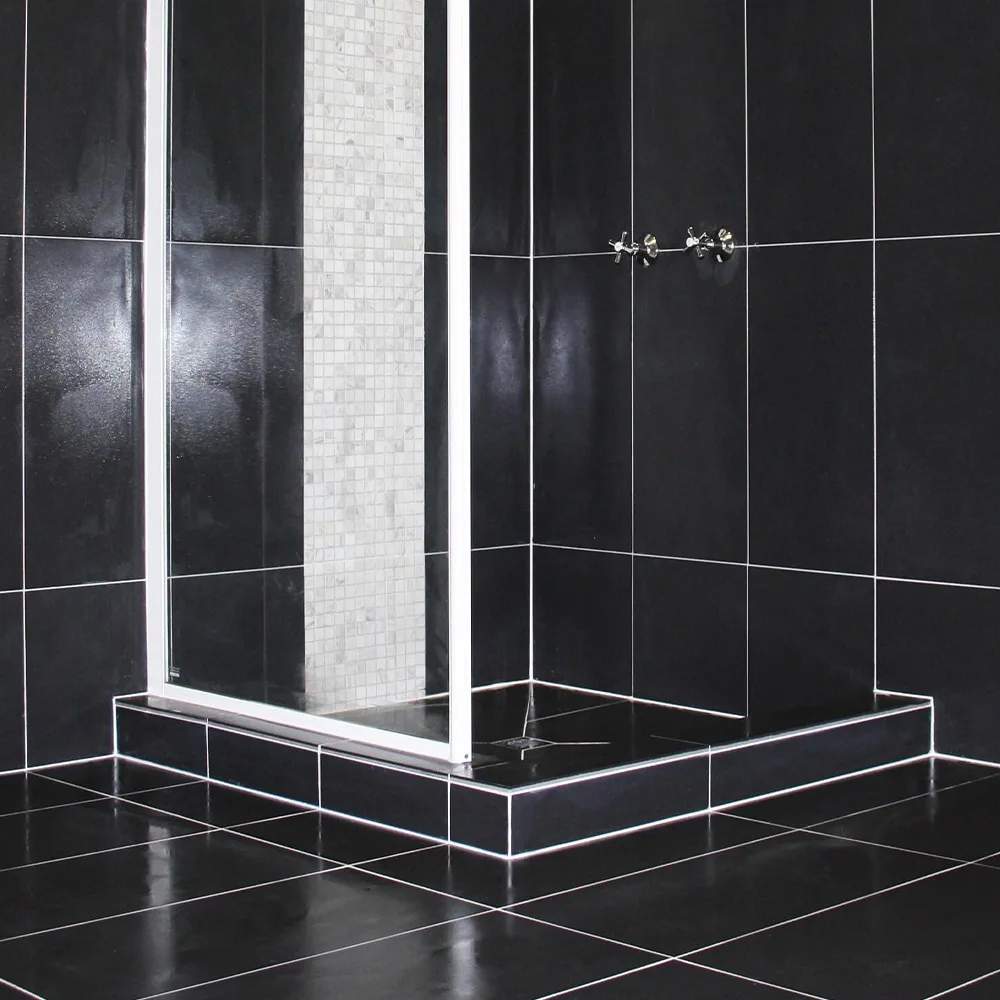
Constructing a Shower Hob: A Foundation for Success
Before you start laying tiles, your tiling project needs a stable, water-managed base – and that begins with creating a shower hob.
A shower hob helps to:
- Direct water flow towards the drain
- Keep wet areas contained
- Support later tile layers without sagging or instability
Building a shower hob should take place immediately after priming but before you waterproof. Follow these instructions for a step-by-step guide for this important task:
1. Choose the size of your new shower within the space, then measure and mark the hob position on the floor using a straight edge. Make sure to double check your measurements and that everything is square (hint: measure diagonally from corner to corner)!
2. Form the hob using lightweight Hebel blocks and secure in place with a cement-based mix, pressing them firmly along your marked lines and joining the ends so the hob feels solid and level. Clean any excess mix from around the blocks before it sets.
3. Mark the fall of the hob towards the drain then screed the base. Australian standards recommend a minimum fall of 10mm for every 600 mm to ensure proper drainage.
4. To create the shower base, mix the screed until it holds together when squeezed in your hand. Spread it evenly across the floor, building up the surface and following your fall markings. Use a level to smooth everything out as you go. Prioritising a clean work surface and level workmanship at every stage will lead to the best result for your beautiful new bathroom.
5. Once the screed has fully dried, sweep the area clean and apply primer again. Finish by sealing all internal corners – this includes the walls, floor and the hob itself – with a neutral cure silicone, ready for waterproofing and tiling.
The secure base of the shower hob is now complete and, once set, will become the canvas to tile a bathroom with confidence.

Waterproofing A Bathroom: Protection Before Tiles
When learning how to tile a bathroom, waterproofing is one of the most critical steps. Leaving it out or cutting corners risks water damage and costly repairs later.
Here’s what waterproofing involves:
Clean & Level
Before you apply any products, make sure all surfaces are clean of dust, paint and old adhesive from previous products. Ensure also that the surfaces are level and solid, to set the stage for strong adhesion and a long-lasting finish. Learn more about our screed and levelling compounds and ensure you set the right foundation.
Waterproof*
Apply a high-quality waterproofing membrane and primer to all bathroom walls, bathroom floor, and shower areas. Ensure you check corners and joints thoroughly to prevent moisture from travelling where you least expect it! Our waterproofing materials create a protective shield that lets you install tiles with confidence.
Key Reminders for a Successful Bathroom Renovation
A well-executed bathroom renovation isn’t just about choosing beautiful tiles – it’s about planning carefully, working methodically, and making smart decisions that will stand the test of time. Perhaps this may include considering the longevity of the design choices, or ensuring that all your tiling in the bathroom is of the best quality available.
Whether you’re tackling a full DIY project or working alongside professionals, these key reminders will help your bathroom renovation run smoothly and deliver results you’ll love:
Plan Before You Start
Rushing into demolition or tile selection can lead to costly mistakes. The old saying states to measure twice, cut once. For your bathroom tiling, this means to finalise your layout and tile choices early to have a solid plan and design. Then measure accurately, and allow extra tiles for cuts and wastage. You don’t want to find yourself one tile short! Also, consider how the space will be used day to day by your family – bathrooms can be a haven for one person and a practical space for another. Good planning creates clarity throughout the renovation.
Prepare Surfaces Properly
Strong results start beneath the shiny surface of your new tiles. Always clean and level the walls and floors regularly throughout the renovation. Repairs any cracks or uneven areas if they arise, or are a result of previous work, to ensure the best result. Prime surfaces correctly, following manufacturer’s instructions before waterproofing or tiling. Skipping preparation can compromise even the most beautiful bathroom design.
Choose Quality Materials
Tiling in bathrooms is invaluable to the success of your DIY bathroom project. However, these spaces experience daily moisture, heat and foot traffic that demand high quality materials in order to stand the test of time. Invest in durable tiles suitable for walls and bathroom floors, slip-resistant flooring for safety and reliable adhesives, grouts and sealants. Quality materials combine the strength of durability with the aesthetics of the beautiful bathroom renovation of your dreams.
Contact Volga Tiling to discuss professional epoxy re-grouting in Melbourne and protect your tiled surfaces properly — without the disruption of a full rebuild.